How to contribute to GRASS GIS development
Guidance for new developers in the GRASS GIS Project
(Last update: 25 March 2025)
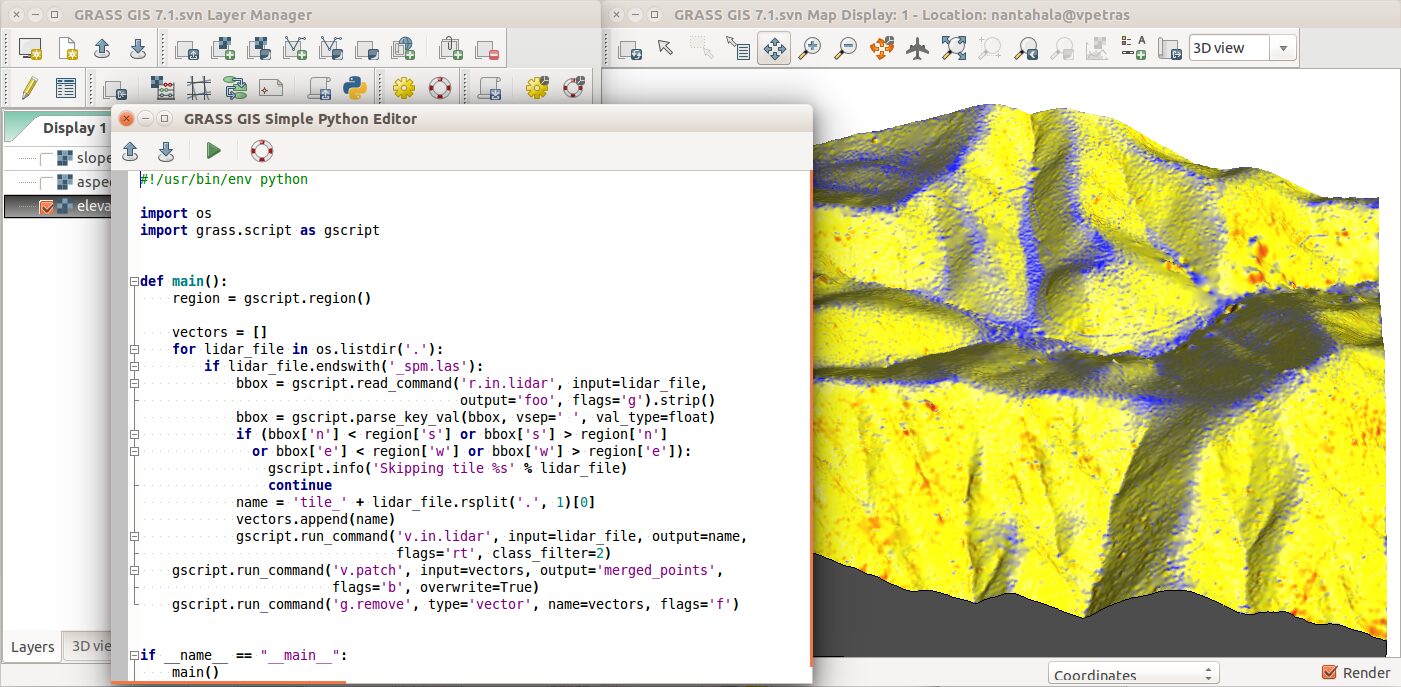
GRASS GIS is a powerful tool for spatial data analysis with robust raster, vector, and geospatial processing capabilities. Whether you’re interested in ecosystem modeling, hydrology, or image processing, this open source platform has a lot to offer. And with a built-in temporal framework and Python API, you can leverage its power for advanced time series analysis and scalable geospatial programming.
The core of GRASS GIS consists of libraries, tools, and a graphical user interface (GUI), all of which are continually improved by a dedicated community of volunteers. If you’re excited to contribute, you’ve come to the right place!
Why contribute to GRASS GIS?
Contributing to GRASS GIS not only helps improve a powerful open source geospatial tool, but also allows you to engage with a global community of developers, researchers and practitioners. Whether you’re an experienced developer or just starting out, there are many ways to make a meaningful impact.
- Getting started with development
- Addons and Core
- Testing changes locally
- Understanding GRASS GIS
- Contributing beyond code
- Opportunities: grants and Google Summer of Code
- Conclusion
Getting started with development
Here is how to get started contributing to GRASS GIS with a focus on Python and the C API by reviewing the existing documentation.
Contributing to GRASS GIS: An overview
If you’re new to GRASS GIS development, follow these steps:
Set up your environment:
-> A software development environment is a collection of software tools on a computer.
- Clone the GRASS GIS GitHub repository.
- Install required dependencies following the compilation guide.
- Use
gitfor version control and understand the project’s branch structure.
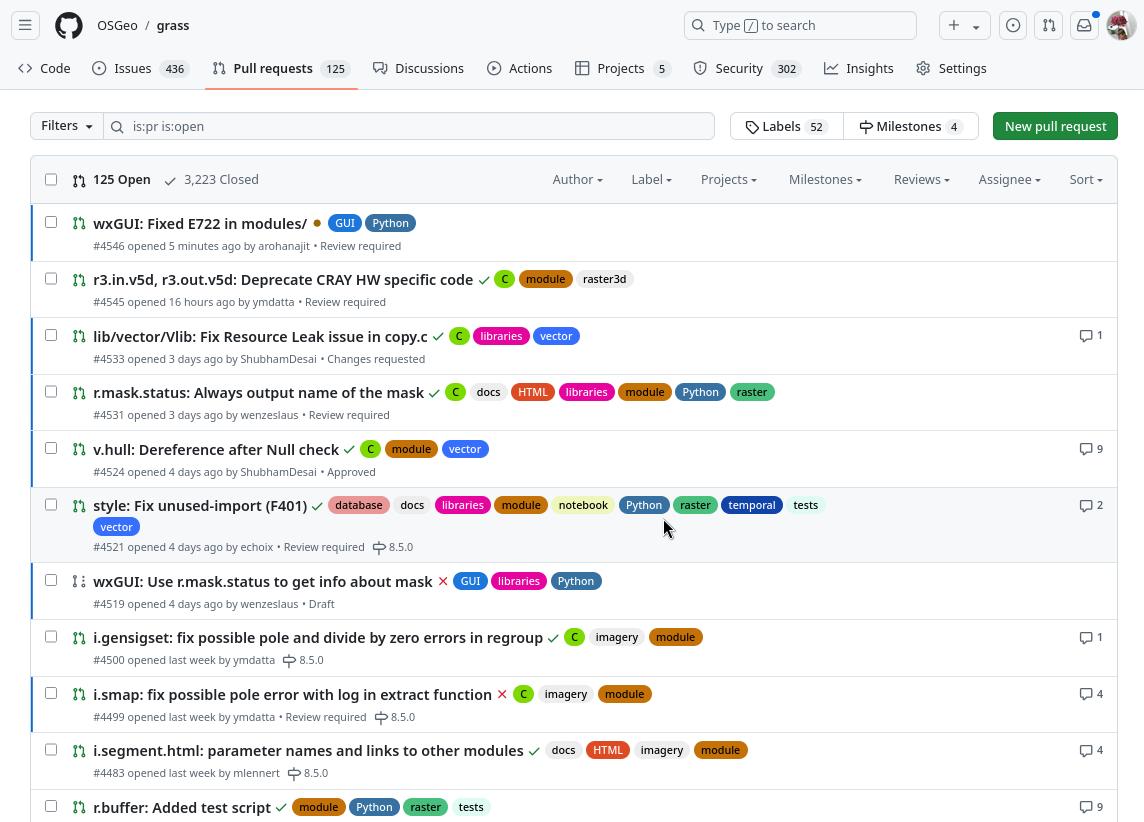
Explore open issues:
-> An issue is a description of a problem in a software.
- Check the issue tracker for beginner-friendly tasks tagged with
good first issueorhelp wanted. - If you find an issue you’d like to work on, comment on it to indicate your interest.
Develop and submit a patch:
-> A patch is a set of changes to existing source code that aim to resolve a bug or introduce a new feature.
- Follow the coding guidelines outlined in the developer documentation.
- Submit a pull request (PR) with clear explanations of the changes.
- Engage with maintainers for feedback and refinements.
Before further diving in, familiarize yourself a bit with the contribution process:
Set up your development environment
- Install GRASS GIS from source on your machine by following the operating specific installation guides. Here some pages:
- Linux:
- Windows: MinGW and OSGeo4W (note that compilation will soonish become much easier with the CMake system – in preparation)
- Mac:
- Docker:
- Brush up on Git, as you’ll need to manage version control for your contributions.
- Set up your favorite IDE with C and Python support, like Visual Studio Code.
Learn the basics
If you already have programming skills in C or Python, you’re off to a good start! GIS users will be familiar with concepts like raster and vector data, but GRASS GIS goes much further. Don’t worry, you’ll catch up quickly.
Explore the codebase
- Clone the GRASS GIS repository from GitHub.
- Browse the code and become familiar with its structure. You can find an architectural overview here.
- When you’re ready to contribute, follow the “fork and pull request” workflow for submitting changes.
And don’t forget to follow the Programming Style Guide to keep everything consistent!
Start small
To ease into development:
- Look for GRASS GIS issues labeled “good first issue“.
- Begin by improving documentation or fixing minor bugs. This will help you familiarize yourself with the process.
- GRASS GIS developers or community members will review your suggested pull request.
- Gradually work up to more complex tasks as your understanding grows.
Addons and Core
Writing GRASS GIS addons
Addons are community-contributed extensions to GRASS GIS. They may be written in Python, C, or C++ (to some extent also in Fortran, Shell, …).
Python examples:
- have a look at the Cookiecutter GRASS addon template which helps you get started!
- many addons are written in Python, so take a look.
C examples:
Python + C example:
- raster: r.futures
C++ examples:
- raster: r.pops.spread | vector: v.delaunay3d | …
Just explore the addons repository on GitHub (addon manual pages).
Writing GRASS GIS core modules
The core GRASS GIS system is a comprehensive geospatial processing environment with over 350 integrated modules designed for advanced geographic data management and analysis. It provides robust libraries and functionality for raster, vector, time-series and 3D spatial processing, with a consistent interface that enables seamless and sophisticated geospatial operations across multiple domains. The programming languages C, C++ and Python are used:
Python:
GUI:
C:
What to know about the parser
The command line interface (CLI) is a part of a computer program that accepts a line of text as input from the user and interprets it in context as a command or instruction. The GRASS GIS parser is very advanced and a standardized command line parsing mechanism that serves several important purposes:
- It provides a consistent interface for all GRASS modules, allowing users to interact with different tools in a consistent way.
- It automatically handles input validation, checking arguments provided by the user against predefined options and constraints.
- Automatically generates the graphical user interface (GUI) for GRASS modules based on the defined options and flags.
- It generates standardized help pages and usage information for each module. This is also used during compilation to generate the manual pages by merging the automatically created header and footer along with the description part.
- It supports different output formats for module descriptions, including HTML, JSON, Markdown, reStructuredText, XML, and WPS process descriptions.
- Simplifies the development process for GRASS programmers by handling common input/output tasks and reducing the need for custom interface code.
By using this parser, GRASS GIS ensures a consistent user experience across its extensive library of modules while streamlining the development of new tools. This is both valid for GRASS-core and addons.
Numerous macros are available to simplify the development process:
- GRASS GIS parser standard options (see here for the full list)
Adding a test
It is not only recommended but highly necessary to add test case(s) to your code.
As an example for a test which uses a small test dataset, see for example r.sim.sediment/testsuite.
Testing changes locally
Once you’ve made some changes, it’s important to test your work to ensure everything runs smoothly.
Build GRASS GIS locally
- Recompile GRASS GIS from source with your updates.
Run the test suite
- GRASS GIS comes with a comprehensive test suite. There are two testing mechanism in place: the gunittest suite and pytest (which is the modern way of testing GRASS GIS). Tests using pytest are written just as any other Python tests, see this pytest example.
- If you find missing tests, take the opportunity to add them!
Manual testing
- Test your changes using both the GUI and command-line interface of GRASS GIS.
- Ensure everything works as expected and check for side effects.
Debugging
If debugging is needed, then see our Debugging Wiki page.
Code submission and review
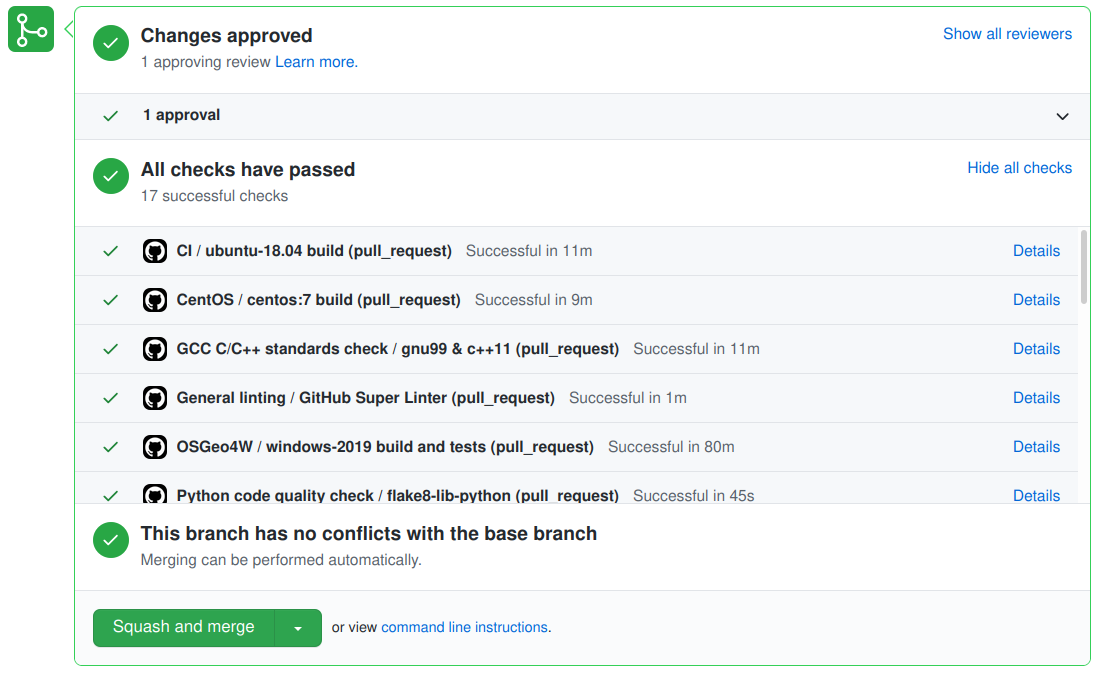
Submit your code changes as a pull request to the GRASS GIS GitHub repository:
- Please check the Guidelines for writing a meaningful pull request.
- Upon submission, automated tests and code analysis tools will be run in GitHub. Keep an eye on the results to ensure your code passes the quality assessment.
- We strongly recommend that you install and enable pre-commit before submitting any new or modified code or other content. This way, any formatting errors and the like will be caught locally before your code reaches GitHub, saving server cycles and energy. Pre-commit runs locally and uses Git hooks to validate and perform automated formatting for a number of file formats, including C/C++ and Python. Pre-commit installs all the necessary tools in a virtual environment the first time you use it.
- Make sure to follow best practices and coding standards during this process.
Understanding GRASS GIS
Becoming familiar with the project’s structure and documentation is essential for effective contributions.
Documentation
- Start with the user documentation and the Programmer’s Manual.
- Python developers can explore the GRASS GIS Python library documentation and PyGRASS documentation.
- Examples for Jupyter notebooks are found here
- Python interface through the ctypes binding of the C API of GRASS
- Wiki page describing the temporal framework and its usage
Repository structure
- Learn the layout of the GRASS repository:
lib/for libraries,raster/andvector/for core functionality,gui/for the interface, and more. The architectural diagram can be found here.
Engaging with the Community
Active participation in the GRASS GIS community can significantly enhance your development experience. Consider the following:
- Join the community and connect with other developers in the Discourse forum.
- Participate in the annual community sprints to collaborate with other developers and get hands-on experience: Code Sprints. Newcomers are very welcome!
Tutorials and guides
First of all, examine existing modules to better understand how the system works. Here are some specific tutorials:
- V. Petras and C. White: Develop Geospatial Workflows and Custom Tools with GRASS GIS
- B. Harmon: Python scripting in GRASS GIS
- A. Petrasova and V. Petras: Parallelization Tips for Geoprocessing with GRASS GIS
- mundialis: How to create a GRASS GIS addon
- Interfacing: How to programatically use GRASS GIS with other languages (Wiki pages)
- … and there are many more tutorials!
Contributing to Documentation and Tutorials
High-quality documentation is crucial for user adoption and effective development:
- Enhance Existing Documentation: Review and improve current manuals and guides to ensure clarity and completeness.
- Create Tutorials: Develop tutorials to assist new users and developers in understanding GRASS GIS functionalities. Sharing your knowledge can significantly benefit the community.
Contributing beyond code
Even if you’re not a developer, you can still contribute to GRASS GIS:
- Documentation: Improve user manuals or write tutorials.
- Testing: Help identify and report bugs.
- Translation: Translate the interface and documentation into different languages.
- Community Engagement: Answer questions on the GRASS GIS mailing list or GIS Stack Exchange.
Opportunities: grants and Google Summer of Code
The GRASS GIS project offers a limited number of student grants for related projects. These may include actual coding, bug fixing, or documentation and creation of educational resources.
- Student Grants offered by the GRASS GIS Project
- Google Summer of Code (GSoC): GRASS GIS regularly participates as a mentoring organization.
- OSGeo Code Sprints: Join global code sprint events to collaborate with other developers.
- Funding Your Work: Some contributions may be eligible for grants or funding through OSGeo or other research projects.
Conclusion
Onboarding to GRASS GIS can feel overwhelming at first, but take it one step at a time. Don’t hesitate to ask questions, and remember that the GRASS community is here to support you. Contributing to an open-source project like GRASS GIS is a rewarding experience that will enhance both your programming and GIS skills.
Happy coding!
Blog-post editing history:
- 18 Oct 2024: initial write-up
- 19 Oct 2024: “Set up” section expanded; addons expanded; more tutorials and guides
- 22 Oct 2024: added “Parallelization Tips for Geoprocessing with GRASS GIS”. Added “Using pre-commit”.
- 27 Oct 2024: added “Guidelines for writing a meaningful pull request”. Added “What to know about the parser”
- 29 Oct 2024: table of content added
- 18 Nov 2024: Python + C example: raster: r.futures added
- 6 Feb 2025: some textual additions
- 25 March 2025: added “Adding a test”
